Web Based Online Exams
The intention is to make online exam available using PHP/MySQL Apache web server. The scripts are commented as necessary, but feel free to update the same. One can install the scripts, and configure the same appropriately, after which, it is possible to create, populate, and deliver the exams over the Internet. The user just needs to login to take the exam(s)
Table of contents
Features
- Simple interface which is intuitive to the user
- Very widely used LAMP environment, where one need not buy any software for making changes or improving the features.
- Learn and exam modes so that users can change between these modes depending on the need
- Scope for improvement
- there is scope for improving the statistics reporting.
Requirements
The server is preferably a web server accessible over the Internet in LAMP (Linux, Apache, MySQL, and PHP) environment. Before going ahead make sure that PHP script on the web server is working properly, and MySQL is installed and accessible using PHP.
Web Server requirements:
- LAMP server environment (Linux, Apache,
- PHP 7.4 or greater
- MySQL 5.6 or MariaDB 10.1 or greater
- Accessibility over the public Internet or Intranet (for use within org network)
Client Side Requirements
Local system (Client computer) requirements: Any Windows 7, 8, 10 or 11 / Linux / MAC computer with any browser aplication may be used to access the online exam application. You can use Windows/Linux/MAC system to access web server remotely and install downloaded server side scripts. You need an FTP software such as FileZilla to upload the files to the web server from your client computer. You also need to have login and password handy to login to the web server using FTP. Web server control panel such as C-panel/PHPMyAdmin will be useful in configuring the web server database, but not essential.
Installation
The installation is manual. Follow the steps given below to install project on your server.
Step 1 : Creating MySQL database
Online Exam project uses MySQL database to save exam information. Login into your phpMyAdmin using login credential provided by your server host and then create a new database with name say “Online”.
Setp 2: Create MySQL user
Next you need to create a MySQL user and give all privileges to the user for accessing and modifying database.
Step 3 : Assign user to database
Next step is to assign the created user to created database and give full permissions to the user.
Step 4 : Get the code
The code can be downloaded as a zip file from the repository. Unzip the downloaded file to make few required changes described below.
Step 5 : Create tables in database
In the unziped folder of the downloaded code you will find a file “sql-statements-online.sql”. To create the tables you can import the sql file directly in to your database using phpMyAdmin cpanel it will create all of the necessary tables, or you can open the file in any editor and copy individual create table statements into cpanel.
Step 6 : Update configuration file
In the unziped folder of the downloaded code you will find a file config.inc. Open the file in any text editor and add the database name, database user, and password that were generated earlier. Sample values are given below:
$datahost = “localhost”;
$datauser = “database_user”;
$datapasswd = “database_pwd”;
$base = “database_name”;
Please make sure you enter correct values as any incorrect value will lead to MySQL connection error.
Step 7 : Upload files to server
Next step is to upload the files to the server. You can use FTP Client (like filezilla) to upload “Online” folder to your server. Before, upload, create a folder by name say “OnlineExams” in the home folder (Usually, public_html or html), and change the destination folder to “public_html/OnlineExams”.
Step 8 : Open the url in browser
Next open the index page in any browser. URL for the index page will be “https://yourdomain.com/upload-folder-name/index.htm”
Screenshots
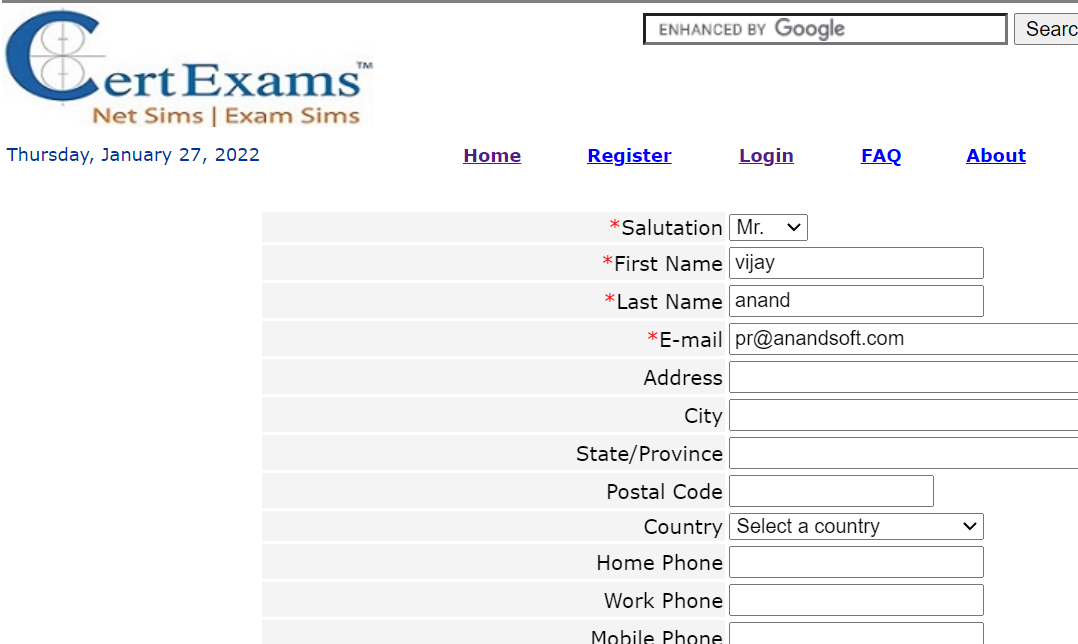
Given below is the login screen (the login is same for user as well as the exam admin. However, admins will have more privileges like creating authors.

Given below is the User dashboard that displays a left pane and a right pane. The left pane enables users to change password, view profile, etc.

There are two modes of exam, one is Learn mode and the other is Exam mode.

Given below shows a typical exhibit based question:

This screenshot shows “Question Review”:

This following screen shot shows Review Screen of the exam being taken by the user:
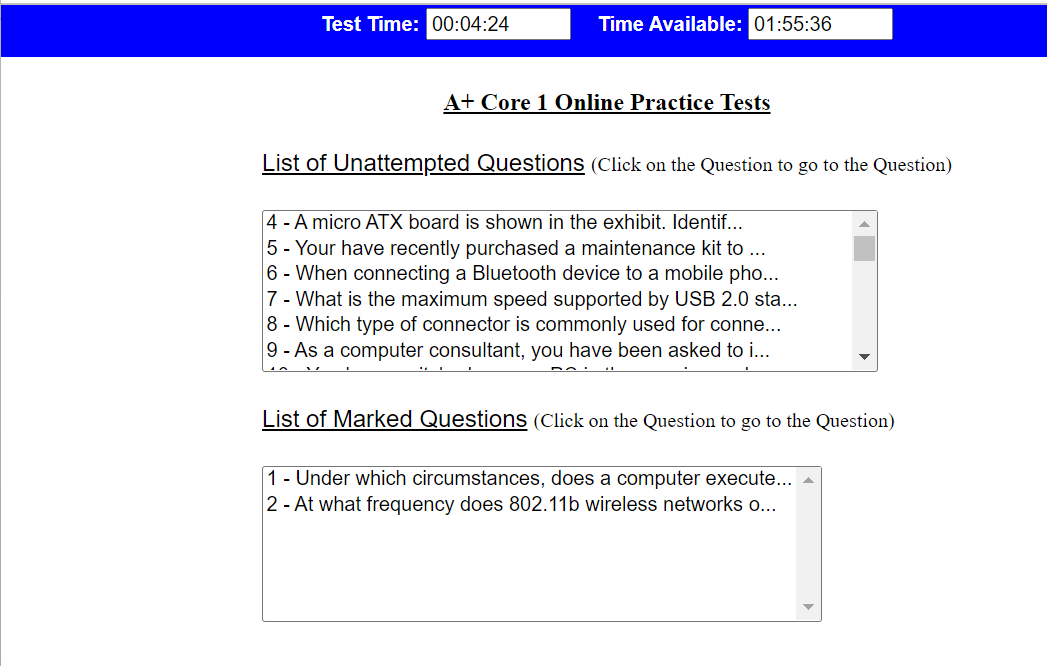
This shows the Review Summary after completion of exam by the user:

Score report screen is shown below for a typical exam taken by a user:

Test screen is shown below where the question being answered by a user is shown:

The following picture shows the User Profile:
How to Use
There are 3 categories of users:
- Administrators
- Authors
- Registered Users
License
The code is under Open Source software license. Individuals may use the code without any permission. Organizational users need to take the permission to use the software.
- Source website: Certexams.com
- View the demo site by logging on to online.certexams.com